Tuesday 28 December 2010

Christmas and New Year...

I had my first Christmas Day with snow...and it was every bit as delightful as I'd hoped; tramping over the field to go to church on Christmas morning in our wellies has never felt so festive! On Boxing Day, we made snowmen and threw snowballs, and went sledging...and then came home for hot buttered toast by the fire.

It's been a fantastic week being all together as a family every day. On Christmas Eve, we all played Hide and Seek in the dark! Even the littlies joined in.

 But it has meant that Modern Country Style has been rather quiet, I know.

*hangs head in shame*

And I've really missed the feeling of sitting and having a natter with you.


I imagine us sitting together somewhere like this. Aren't those chairs gorgeous-looking? And that rug?

{Yum...}

Once New Year is over then everything will be back to normal.

{I promise}

Speaking of New Year (and how's that for a seamless change of subject?!)....I love it! I found this gorgeous picture which sums up how I feel about it.


New Year's Eve is a bit like standing in a hallway of a New House; you're not quite sure what it's going to be like....but you know enough to see that it'll be lovely.

Happy New Year to you all.....


1: Unknown, 2: La Maison Boheme

Enter your email address:

to subscribe to Modern Country Style


Thursday 23 December 2010

Joy to the World.....


Let Earth receive her King...

Merry Christmas!!


Enter your email address:

to subscribe to Modern Country Style


Tuesday 21 December 2010

Kate Forman's Country Christmas


This is the fabric designer Kate Forman's country house at Christmas. Isn't it beautiful? I love the combination of the red with the candlelight. Delicious...


I hope you're keeping warm. We have snow!! I'm hoping, hoping, hoping that we're going to have my first EVER White Christmas this year.

{Please, please, pleeeeeeeeease?}

In the meantime, I'm off to have a glass of mulled wine and a mince pie.

{Yum!}


(via Period Living)

Enter your email address:

to subscribe to Modern Country Style


Friday 17 December 2010

Cinnamon Starburst Wreath AND Centrepiece!!


I was almost beside myself with joy when I suddenly had the idea that if the hole in the centre of a wreath was made to be a specific size, I realised I could use my Cinnamon Starburst Wreath as a gorgeous Christmas table centre-piece with a candle burning in the middle.


Well, I've been planning and refining it to make it as perfect as possible for you and now it's ready for its full reveal!!

 Cinnamon, candles AND Christmas table centre-piece?

{Excitement overload!!}

Let me show you how I unfolded the plan.

This is what I needed:


A kg of cinnamon sticks;
A piece of thick sturdy cardboard;
Some lovely gorgeous material;
Super Glue;
DecoArt So Soft Fabric Paint
Large paintbrush


Step 1
To make the wreath base, I drew around my large pillar candle onto a piece of really thick, strong cardboard. It really does need to be strong to support the weight of the cinnamon sticks.


 Then, using a side plate, I drew a larger circle around it.


 I cut out the inner circle and around the outer circle so that I had a perfectly-sized wreath base.


Step 2
I began placing the cinnamon sticks onto the wreath base, spacing them evenly.


I attached the cinnamon sticks to the base using Super Glue.
Oh my goodness, that stuff is STRONG!
{Top tip: don't tap your fingers together to see if you have glue on them. Yup, that was me!!}


You can either apply the Gorilla Super Glue to the sticks or directly to the base itself. Try to use the thicker pieces first, as the thinner sticks are good for filling in gaps at the end.


Then I slowly built up further layers of cinnamon sticks until I had three or four layers around the middle. It needs this many otherwise it looks sparse around the edges.


I used shorter pieces for the final layer.


Step 3
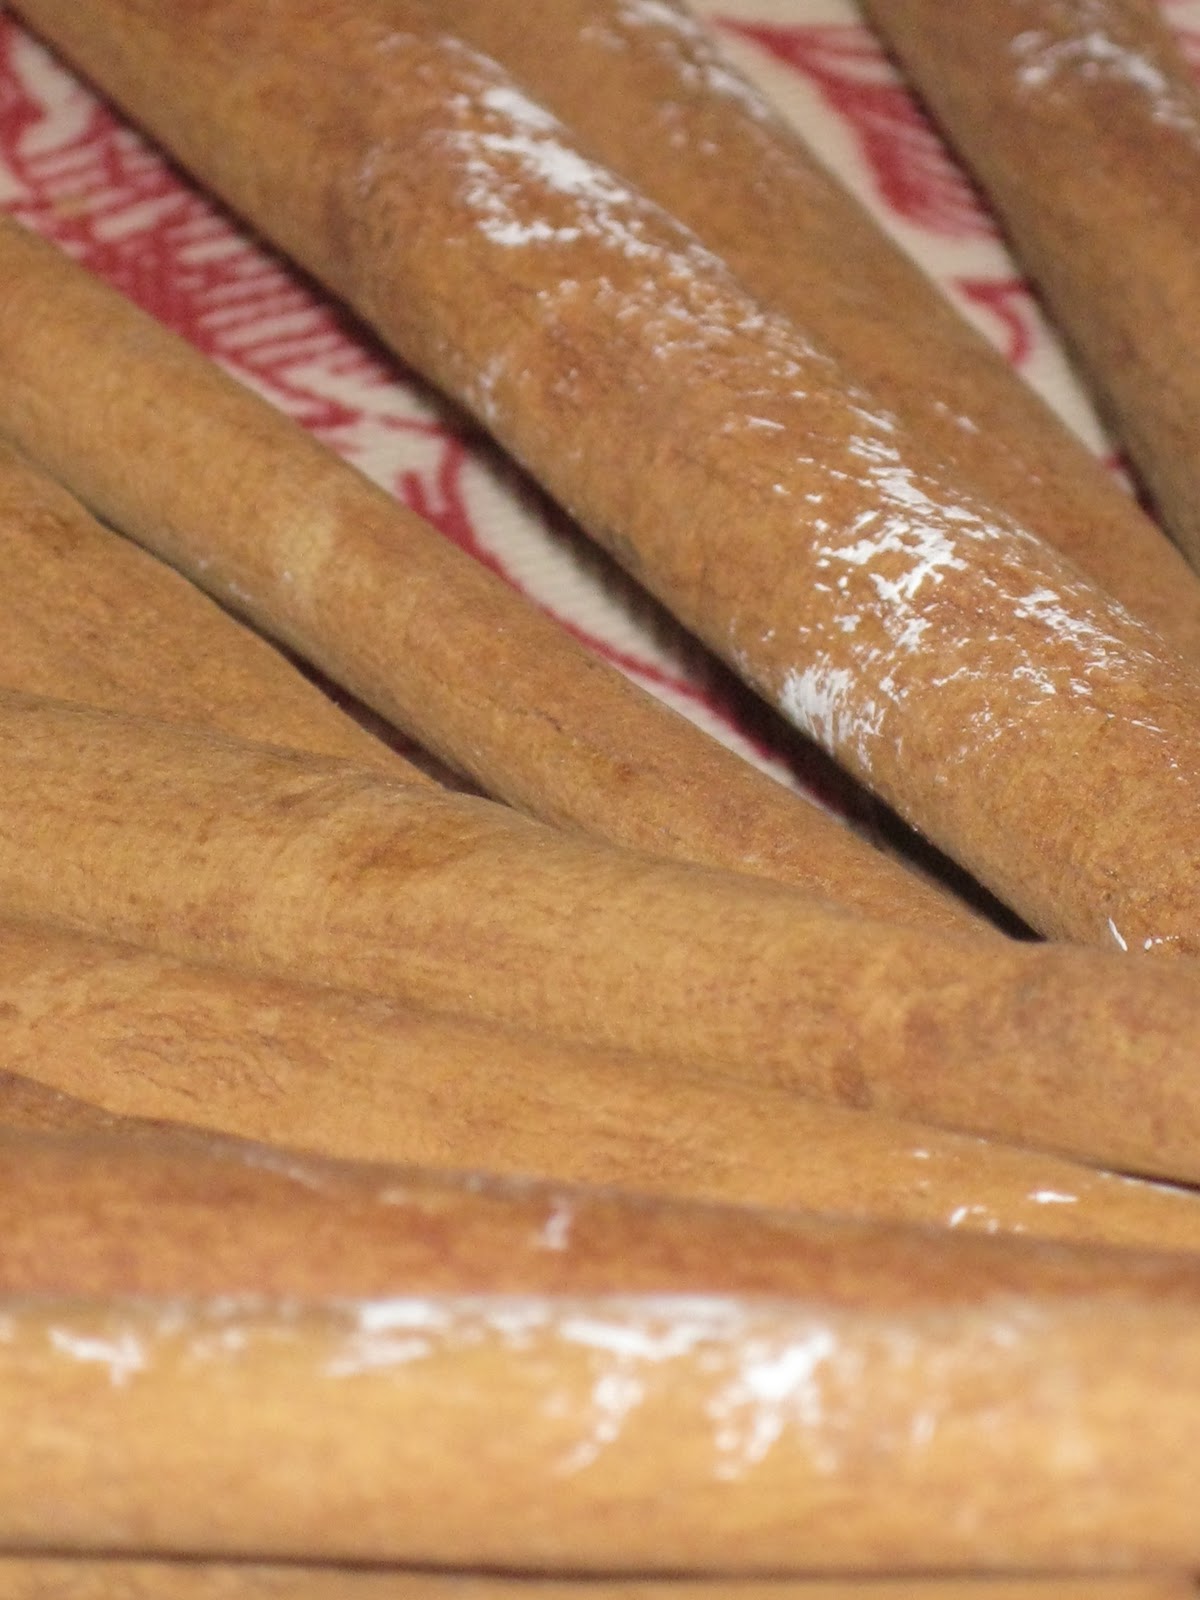
I wanted my Cinnamon Starburst to look super-duper Christmassy as both a centre-piece AND a wreath so I wanted to add a snow effect.

I used DecoArt So Soft Fabric Paint in White.

Yes, I know cinnamon sticks aren't made of fabric, but when I tested various ways of getting the snow effect I was after, this created exactly the look I wanted.


I used my paint brush to dry-brush the paint onto the cinnamon sticks.


To dry-brush, you only need a small amount of paint on the brush at any time. So, dip the brush in your paint and dab it repeatedly onto an absorbent cloth. Can you see how dry the paint looks on my brush?

Then you need to almost rub the brush onto the sticks, rather than normal back-and-forth painting.


Ideally, you only want to cover each section once to avoid a painted look; I wanted more of a 'freshly fallen scattering of snow'.

That's why I used my 4 inch brush. It's coverage is quick and excellent for dry brushing. It's really worth using a good quality brush like this one. Who wants to be picking out paint hairs afterwards!!?

Now for the fun bit!!

If you want to use the Cinnamon Starburst Wreath for a table centre-piece, you just slot the large pillar candle into the middle and light up!


It looks SO beautfiul, and as the candle warms the cinnamon sticks, the whole room is filled with the most gorgeous aromatic fragrance.


And now for the magic second step!

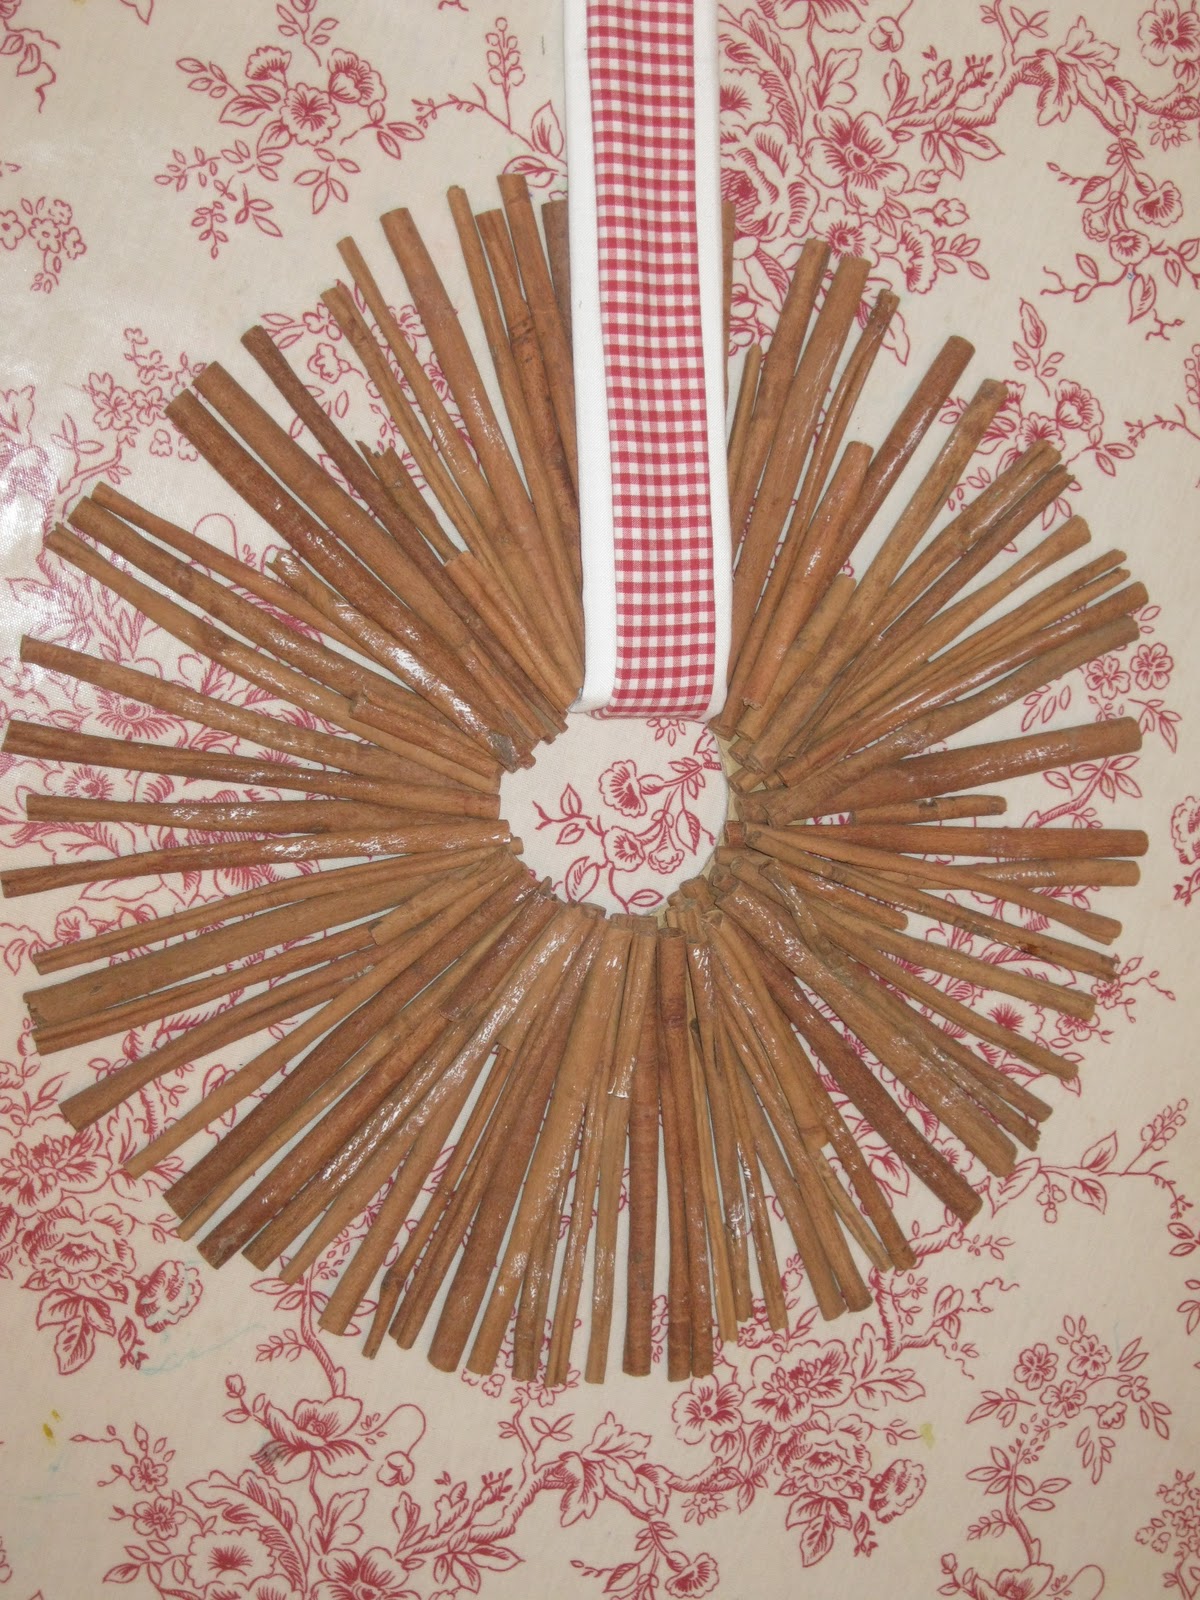
To use the cinnamon starburst as a wreath, remove the candle, loop a length of gorgeous fabric through the centre of the wreath and hang it up!


I used two layers of material, one in snowy white and the other a red gingham to give the Cinnamon Starburst wreath a Christmas-in-the-Country feel!


This is the Transformer of the wreath world!! A wreath and table centre-piece two-in-one!!

Merry Christmas to you all, my lovely friends.

Enter your email address:

to subscribe to Modern Country Style


Wednesday 15 December 2010

Meet Mister Santa!


Do you know, I started this sweet little Santa Claus last Christmas? I got a bit stressed with him because it streeeeetched my sewing skills....and fraaaaaaayed my temper.


{I should probably tell you that 'a bit stressed' is an understatement of the hugest proportions. But I think you probably knew that already....}


 I decided that getting so frustrated with a little stuffed toy was a sign that I was doing too much in the run-up to Christmas and so I popped him away in my craft stash until this year.

{And I didn't do the gingerbread stuffing that year either.....I went and read Christmas stories with the children instead.....Yes, I was officially a Christmas slacker....}


When I got him back out, I found that I was full of renewed vigour for completing the project in time for this Christmas and that it was actually far easier than I'd been stressing about. Yay!


{And that is basically the crux of my excuse for keeping so many craft projects on the go at once. Are you listening, Mr Modern Country? It's all about waiting for renewed vigour, you see.....}


I made Mister Santa following a mix of patterns in the brilliant Christmas books by Tone Finnanger: Crafting Christmas Gifts and Sew Pretty Christmas Homestyle. Have you seen these books before? If you haven't, and you like sewing, then I have to warn you that these books will take you to another level of craft-book ecstasy!


They are packed FULL of brilliant and gorgeous Christmas sewing projects, for all skills, and all styled completely beautifully. I've put them over on my Amazon sidebar if you want to link through directly.


I used material that I already had: pinky-beige cotton for his skin, pale cream wool for his hair, thick red velvet for his lovely coat and some bits of my red tea-dyed checked/striped fat quarter for his trousers and hat (the same fabrics that I used for my Cinnamon Heart Garland).


I love his big ole feet!

Every time I see Mister Santa perched on his radiator cover throne, I give a little inner squeal to myself. He's just so darn cute, isn't he? It's honestly as though he has taken on a character all of his own!

Just before I go, may I just tell you that Cath's gorgeous blog, Tigs White Canvas, has *the* most fantastic tutorial for making Christmas clay ornaments?


Really gorgeous ones that totally inspire you to have a go yourself. Have a look and see whether you can resist her charms. Yes, did I mention that she's LOVELY too?

Oh, and I'm just putting the finishing touches to one of my favourite Christmas projects this year. It's a very special two-in-one extravaganza.  


I just can't stay away from the cinnamon, can I?! Come back and see....

I'm linking up to my favourite linky parties in my sidebar....


Enter your email address:

to subscribe to Modern Country Style


Monday 13 December 2010

Children's Crafts and Wreath Party Round-Up


We had such a lovely weekend getting everything ready for Christmas. Whenever we have the Decorating Weekend each year, I try and think up crafts for the children beforehand so they can feel involved while we get on with decorating round them.

{There's nothing quite like *another* bauble casualty to put a dampener on my festive cheer...}

This is what my second eldest made. I loved it so much that I thought I'd show you. It's easy-peasy but takes a good chunk of time to do.

{Perfect for a children's craft in my book.}


I gave her a bowl and sent her into the winter wilds of our  garden to find some firm red berries. Then she carefully threaded the berries onto some wire.


When enough were threaded, we twisted the ends of the wire together, squeezed it all into a heart shape and added a pretty ribbon.


Obviously, the person doing this has to be responsible enough to know not to eat the berries but this was a great craft and only needed very minimal supervision.


I'm linking to Holly at Homebody's Thifty Gifty Party. Thank you all so much for linking up all your gorgeous wreaths at my Wreath Party last Friday.

{Well, it started on Friday but turned into a Weekender Bender...}

 I've picked some out especially for you to feast your eyes on....


imageanchor="1" style="margin-left: 1em; margin-right: 1em;">


Gorgeous, eh? Aren't they beautiful?

{*drool*}

I just love the versatility of wreaths.


So, what's coming next time? Well, I have this to show you:


Meet Mister Santa, my most ambitious project yet....


Enter your email address:

to subscribe to Modern Country Style


Related Posts with Thumbnails
 
01 09 10